How do I set up a charging schedule to charge at fixed hours (delayed charging)?
What is a charging schedule for?
With a charging schedule your car starts and stops charging at a fixed time every day. Useful when you want to charge at night during the cheap hours of a dynamic tariff or of the CREG tariff, or when you simply don't want charging to begin the moment you plug in the car.
As long as Wattify is the operator of your charge point, the manufacturer's app (Easee, Zaptec, …) blocks its own charging schedule. Wattify's charging schedule replaces it and works for every charge point that is connected to Wattify and can be started remotely.
What do you need?
A charge site you own or manage.
A charge card on your account. The charging session starts in the name of that charge card and is invoiced accordingly.
Advanced Settings enabled on that charge site (see step 1).
Setting up the charging schedule
Step 1. Enable the advanced settings
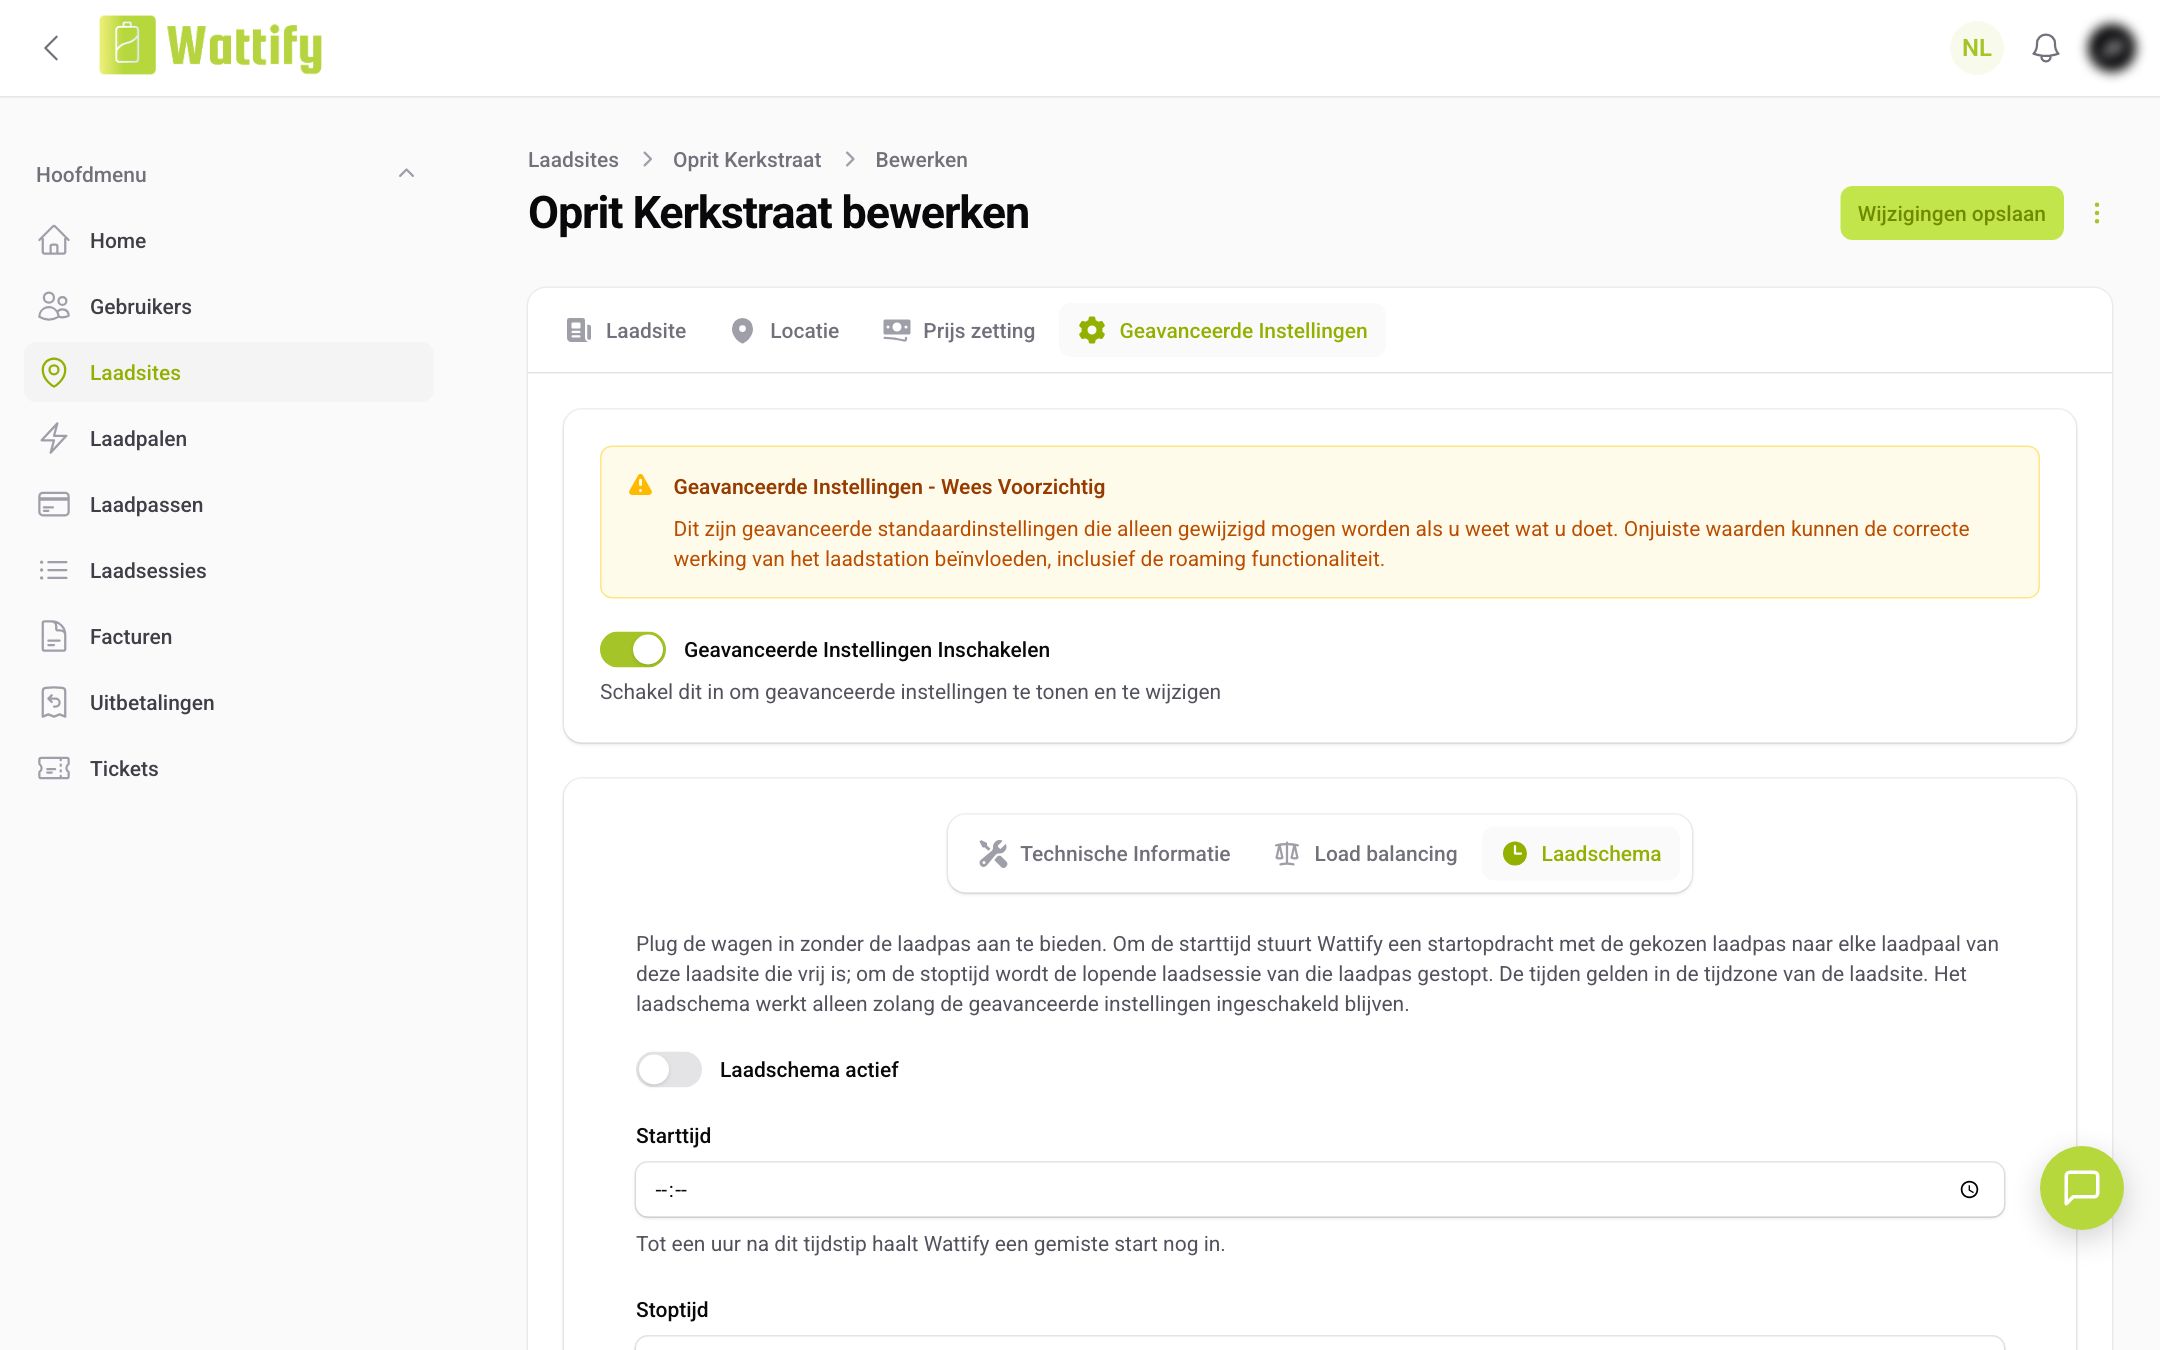
Log in to mijn.wattify.be and click Charge sites in the menu. Open your charge site with Edit and go to the Advanced Settings tab. Switch on Enabling Advanced Settings. If nothing is ticked yet under Technical Information at Functionalities, tick at least one functionality (for instance Remote start stop possible), otherwise the charge site cannot be saved.
Step 2. Fill in the charging schedule
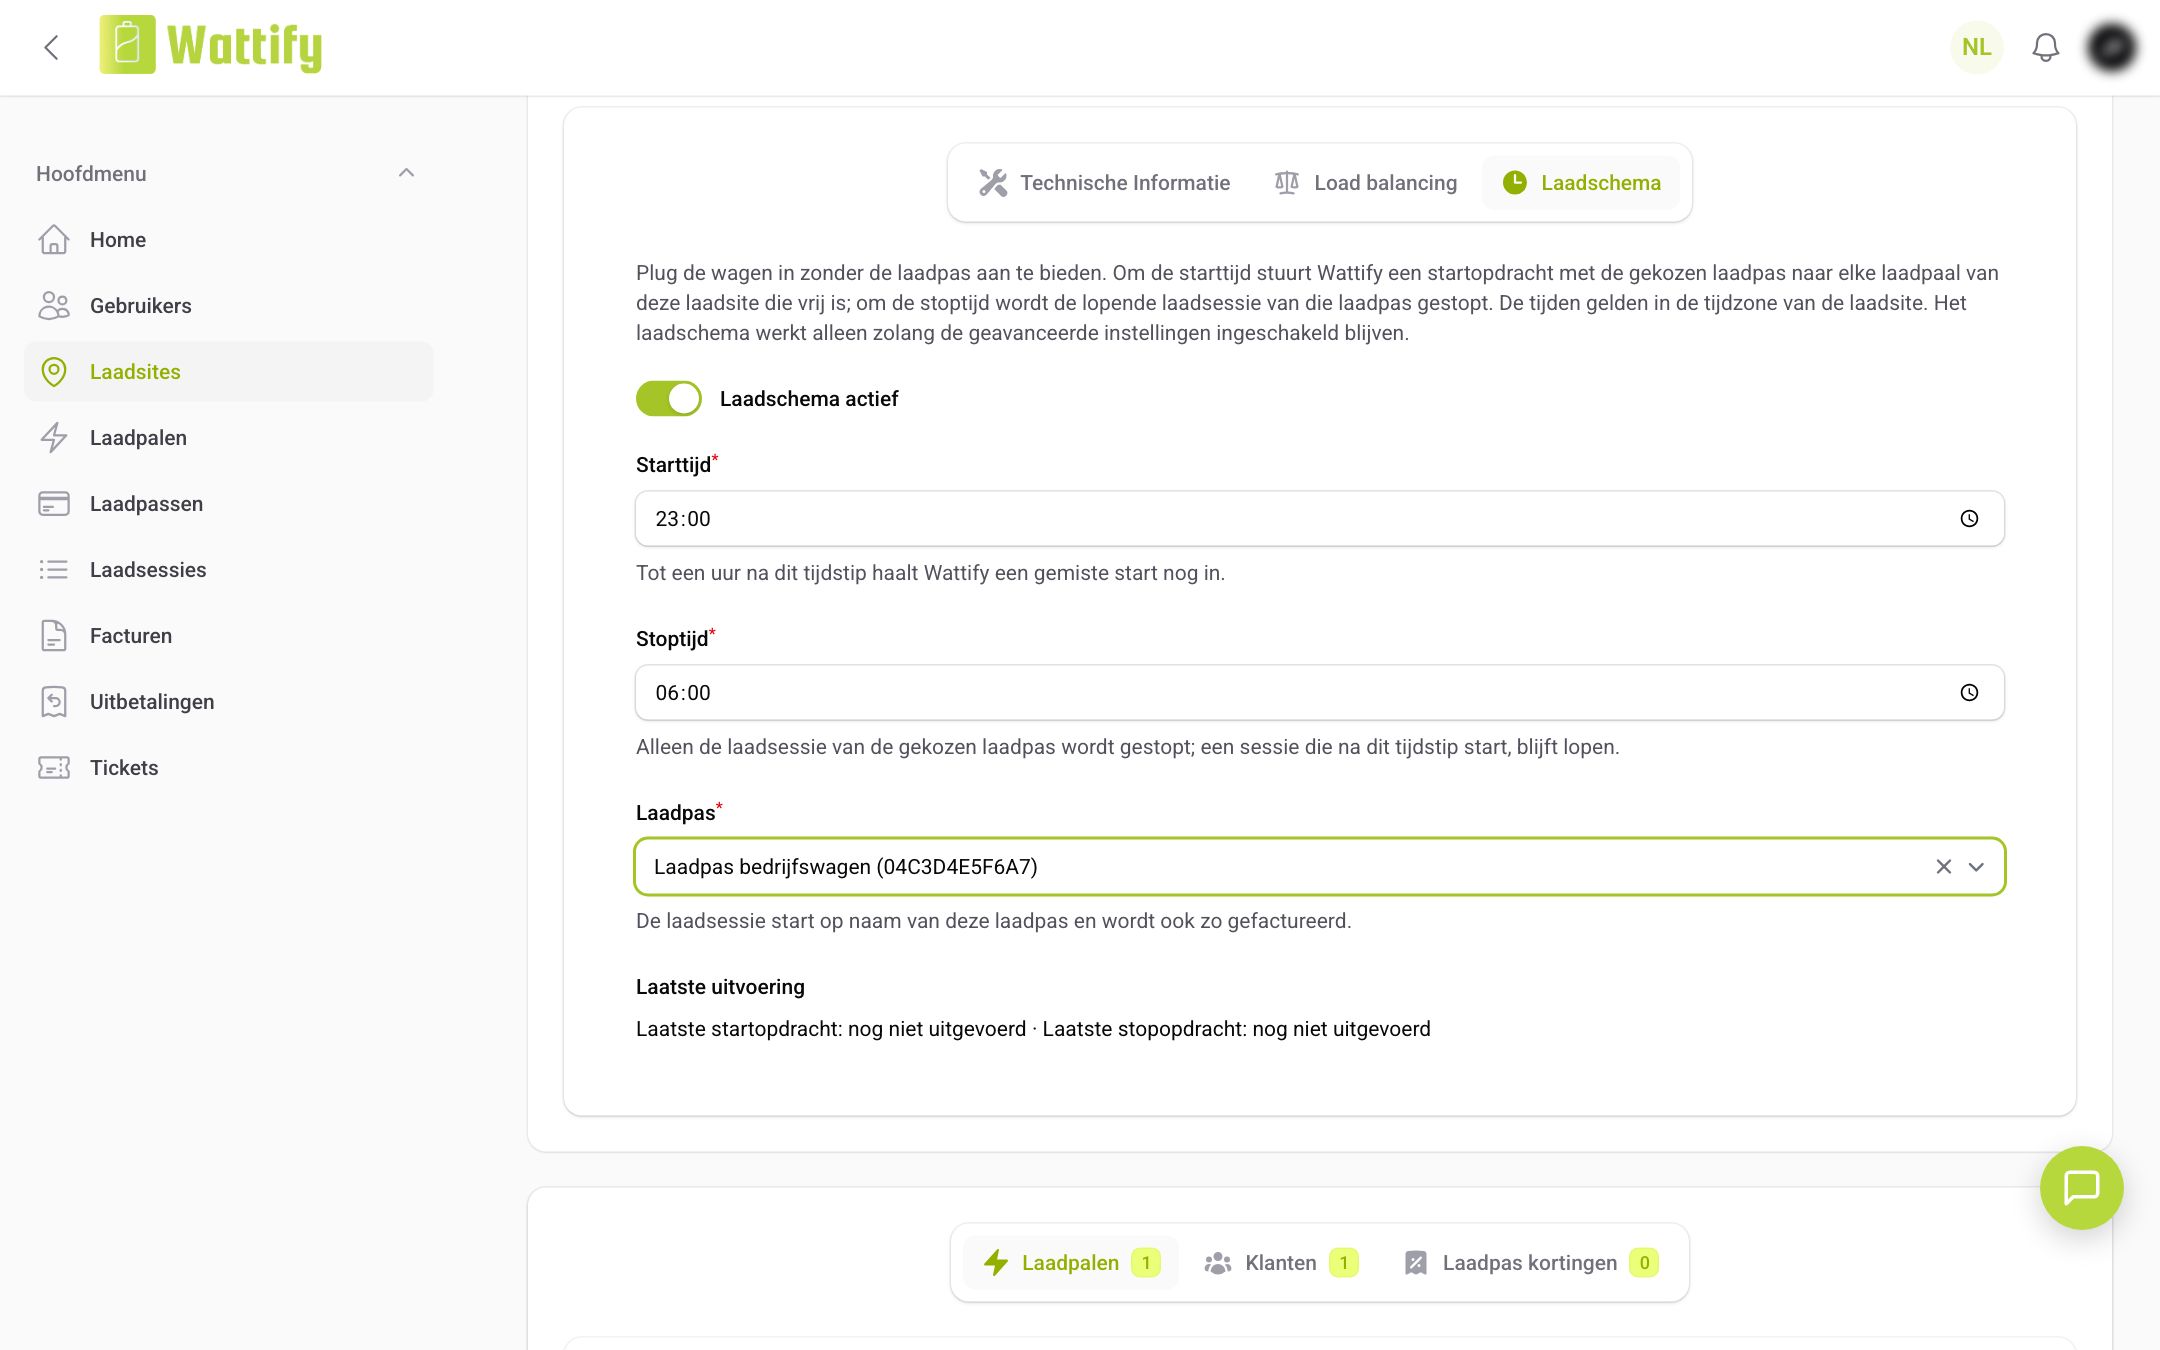
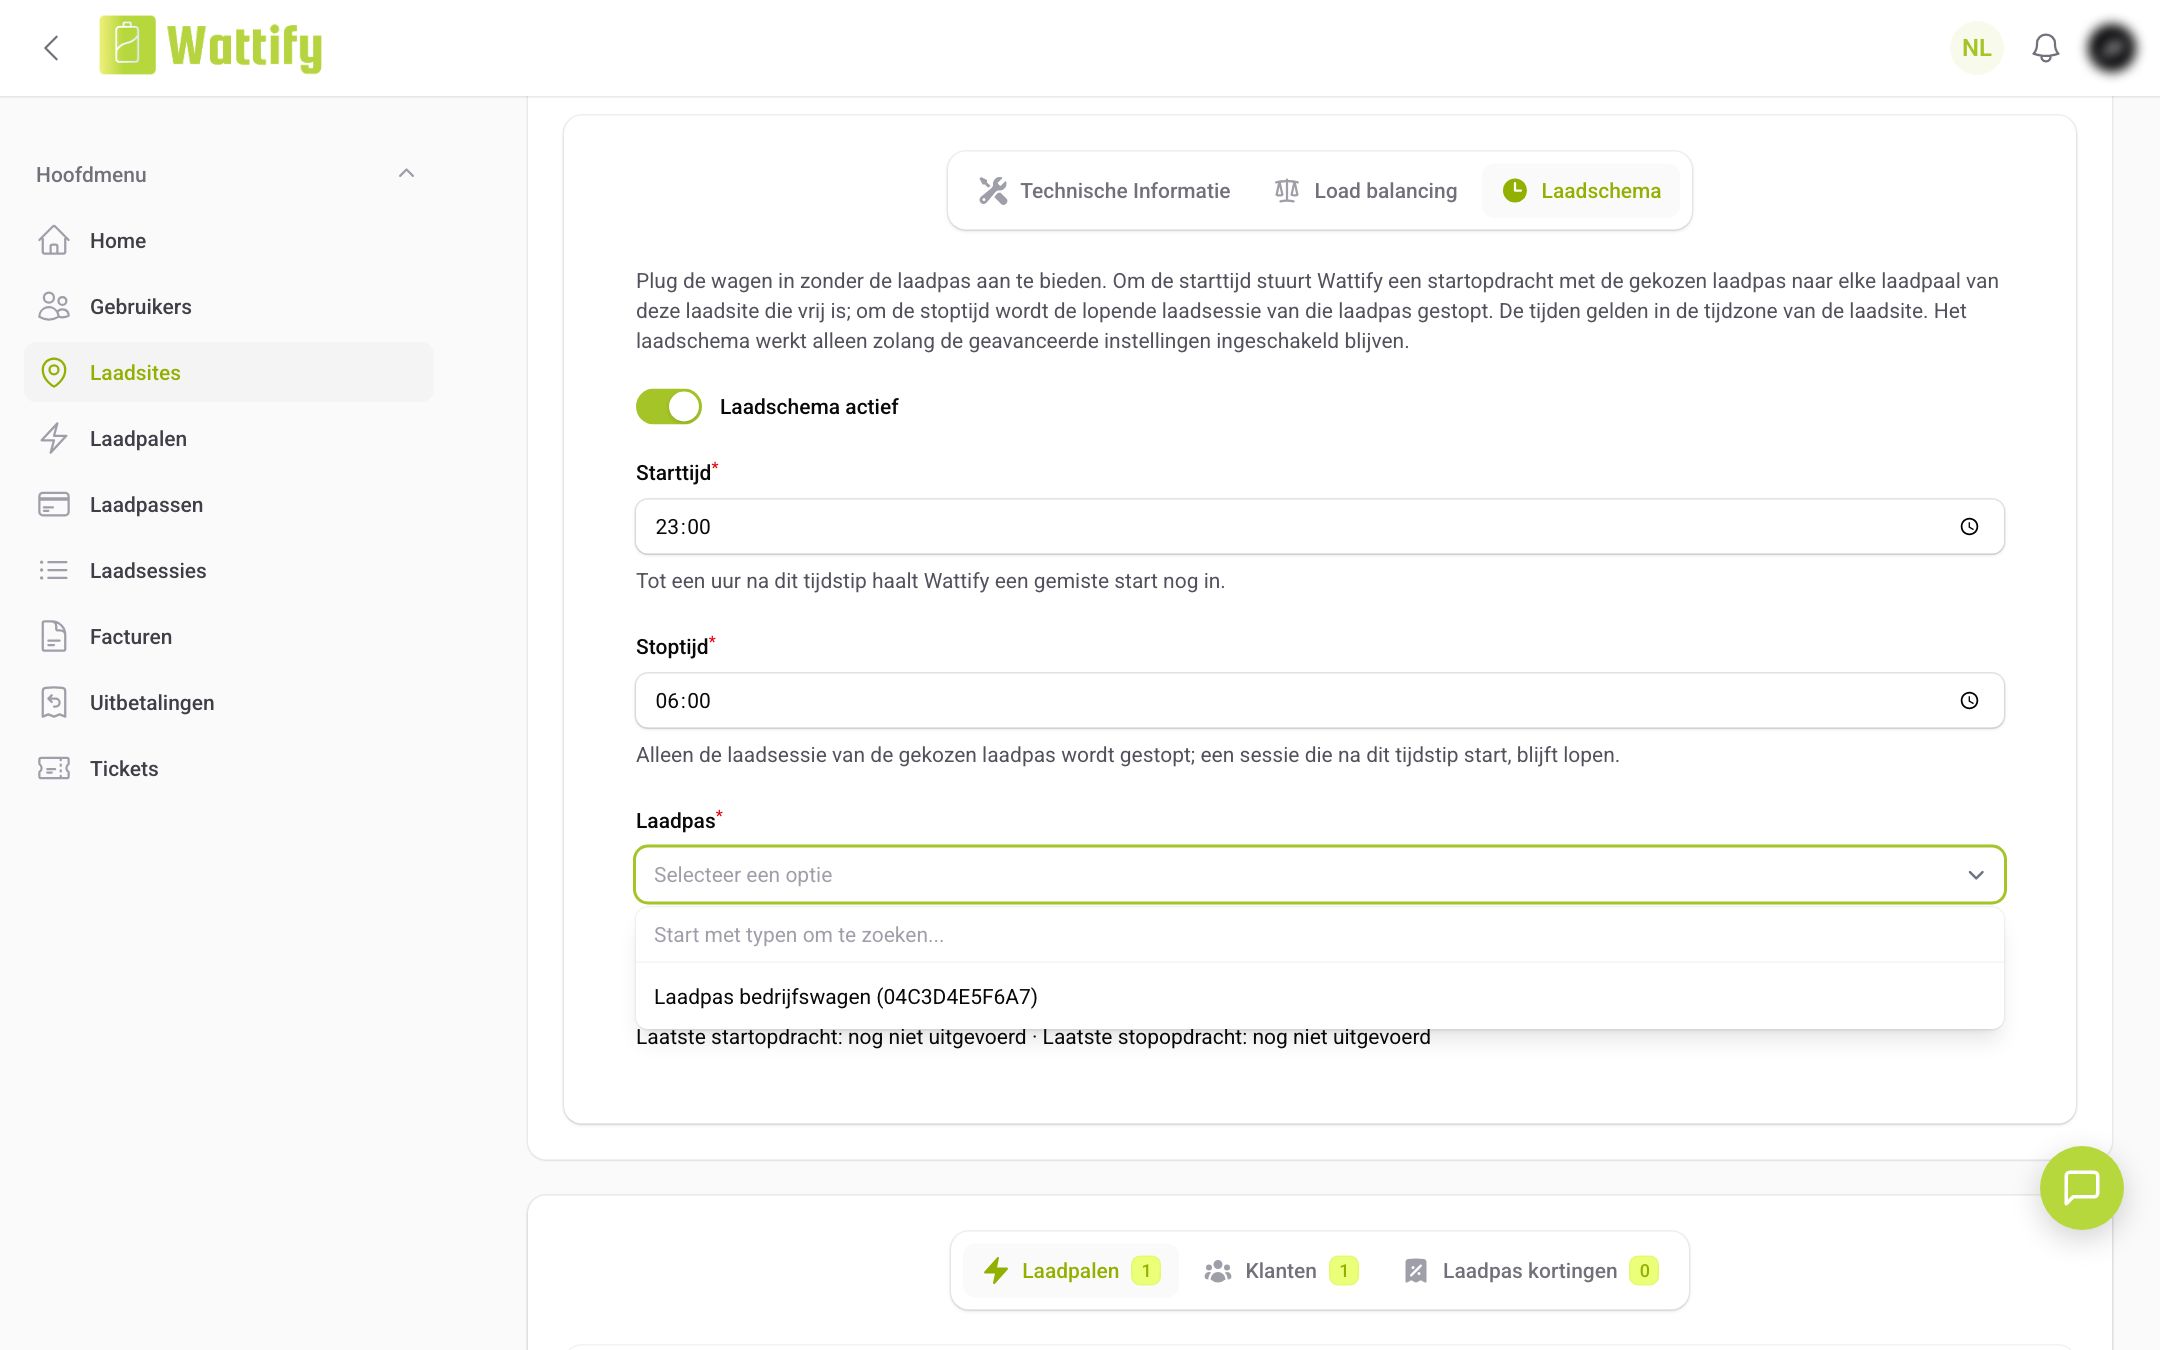
Click the Charging schedule tab and switch on Charging schedule active. Choose a Start time and a Stop time. A start time after the stop time is allowed: with Start time 23:00 and Stop time 06:00 the car charges through the night. The start and stop time may not be the same. At Charge card, choose the charge card the charging session should start with; you can pick from your own charge cards and the charge cards linked to the charge site. Then click Save changes.
Step 3. Plug in the car and do not present your charge card
Plug in the car in the evening, but do not present your charge card. At the start time Wattify starts the charging session with the selected charge card on every free charge point of the charge site. At the stop time Wattify stops the charging session of that charge card. If you do present the charge card, charging starts immediately and simply stops at the stop time.
Checking whether the charging schedule ran
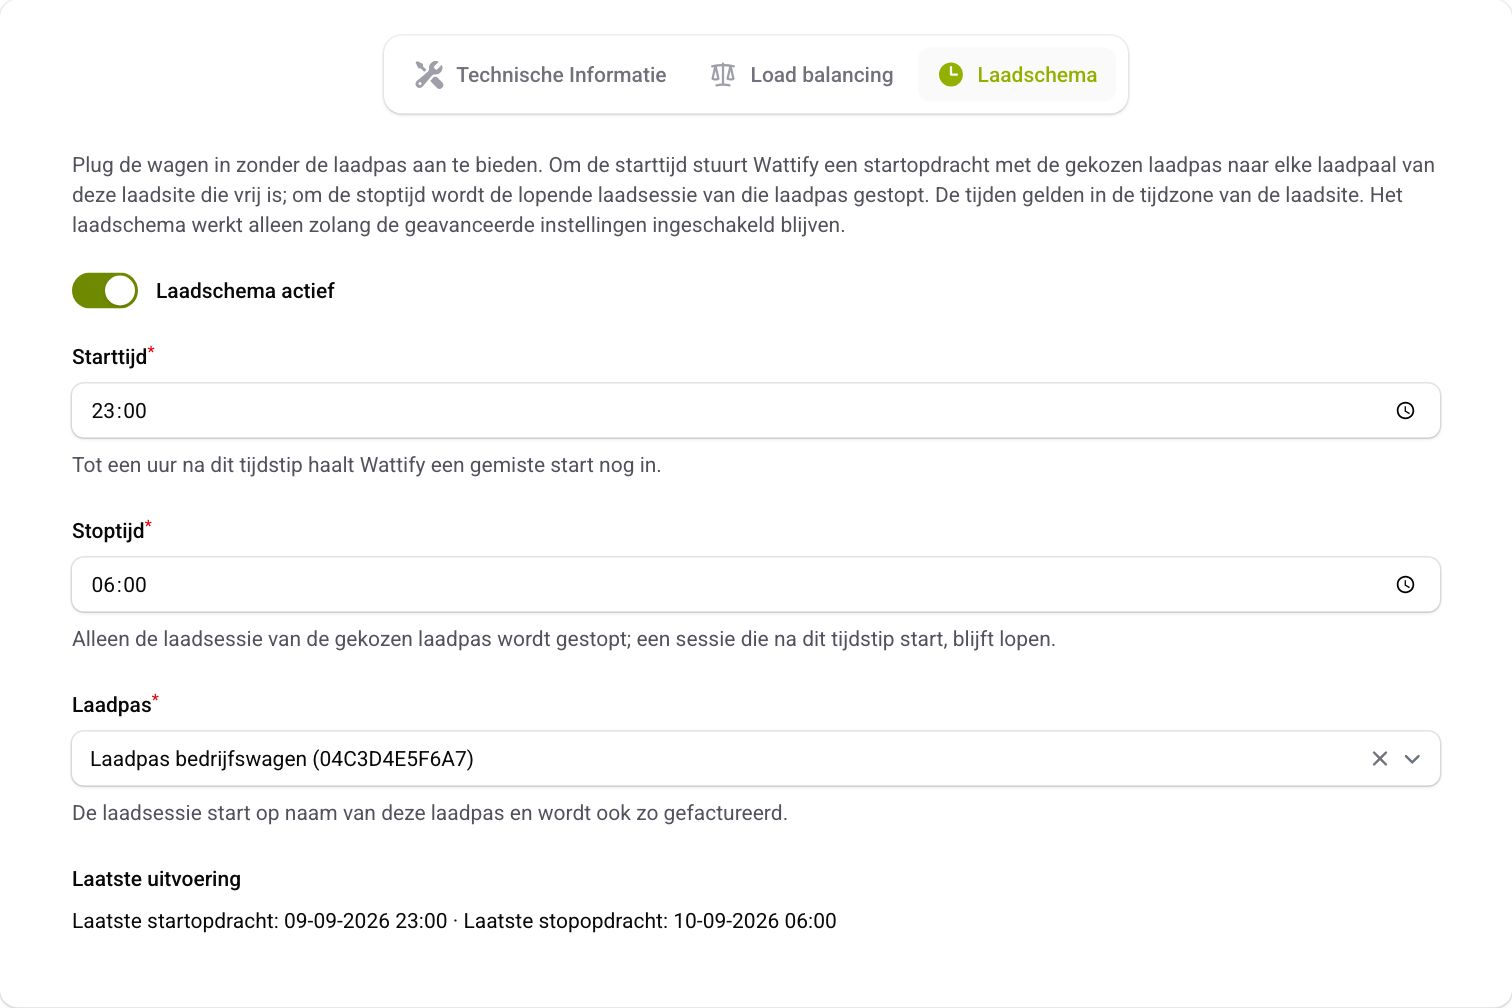
Under Last run on the Charging schedule tab you see when the charging schedule last carried out its start and its stop, in the timezone of the charge site — even if no charge point was free or no charging session of that charge card was running at that moment. The charging session itself is listed under Charging sessions.
Good to know
Only the charging session of the selected charge card is stopped. A charging session that starts after the stop time, for instance in the morning with the charge card itself, keeps running.
If Wattify missed a start or a stop, for instance because of an outage, it still catches up on it up to one hour later.
The times apply in the timezone of the charge site.
A charge point on which charging is already in progress is skipped at the start.
If you switch off Enabling Advanced Settings, the charging schedule stops too.
If you move a time to a later hour after Wattify has already run it that day, Wattify runs it again at the new hour. If you move it to an hour that has already passed, the new time applies from the next day.
Switch off any charging timer in the car itself, otherwise the car refuses to charge when Wattify starts the charging session.
The charge point must be online: a charge point without a connection to Wattify does not receive the start and stop commands.
Did this answer your question
Thank you for your feedback
Did not find an answer?
Our team is just an email away and ready to answer your questions